Mailchimp
Using Squeezely with Mailchimp
Find out how to use Squeezely the integration between Squeezely and Mailchimp. This guide covers:
- Setting up the connection
- Data Syncing between Squeezely & Mailchimp
- Using audiences in Mailchimp
- Triggering a Mailchimp automation from Journey Builder
- Statistics from Mailchimp
Setting up a connection between Squeezely and Mailchimp
Go to your company settings and find the Mailchimp section. On below form, fill in all the fields.Find an explanation for all fields below.
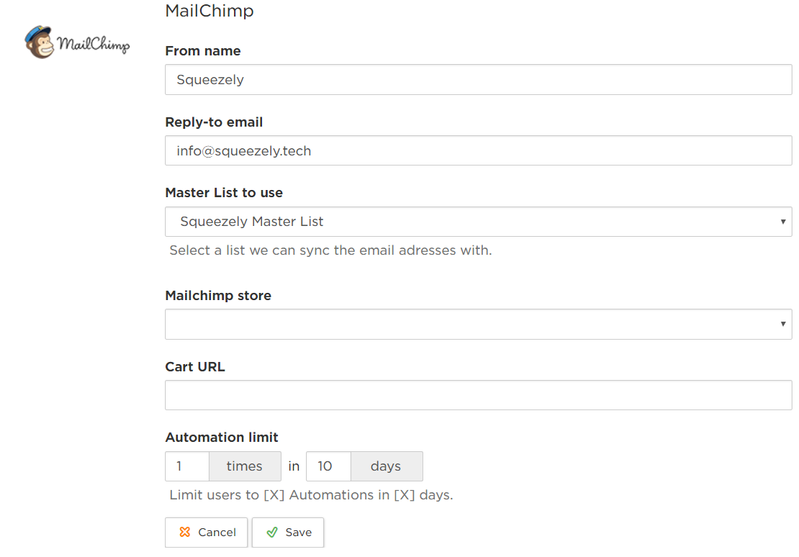
From name
This will be the default name entered in the 'From' field when creating a Mailchimp campaign.
Reply-to email
This will be the default email address entered in the 'Reply-to email' field when creating a Mailchimp campaign.
Master List to use
Select your Mailchimp Masterlist you want Squeezely to sync with. If left empty a new masterlist will be created.
Mailchimp Store
Select the Mailchimp store you want Squeezely to sync with. If left empty a new store will be created.
Cart URL
When using Mailchimp automations this URL will be used to redirect users to their shopping cart. This can be for example www.yourstore.com/cart or just the main page of your store.
Automation Limit
The automation limit makes sure you don't send to many automated emails to your customers. 1 times in 10 days, will make sure that no more than 1 automated email is sent to any user in a period of 10 days.
Data syncing between Squeezely & Mailchimp
Squeezely syncs data with Mailchimp in the following cases:
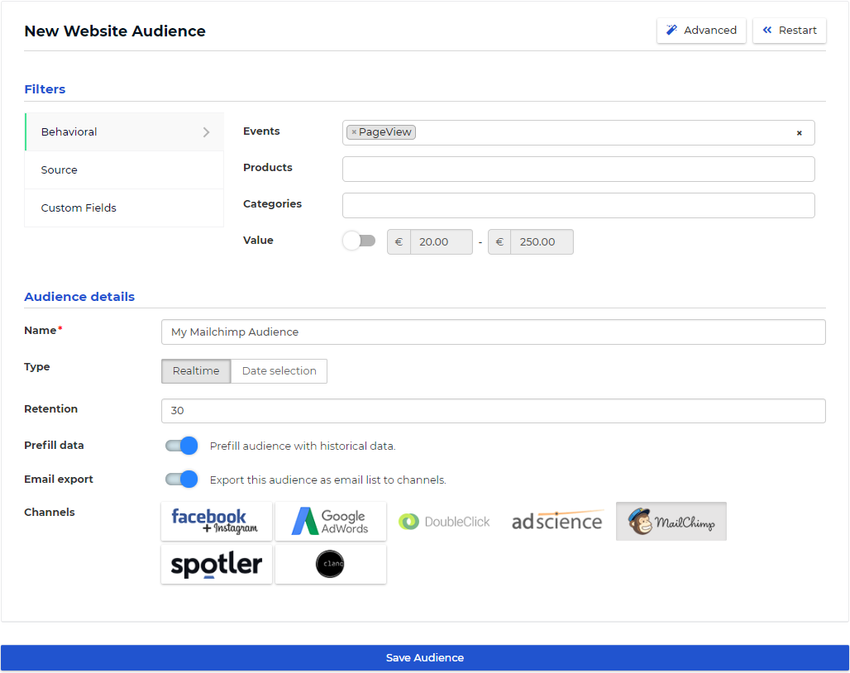
Using Squeezely Audiences in Mailchimp
Following below steps will show you how to export an audience from Squeezely and where to find it in Mailchimp.
Exporting your audience
- Create an audience in Squeezely Audience Builder.
- Select Mailchimp as export channel.
- Press 'save'.
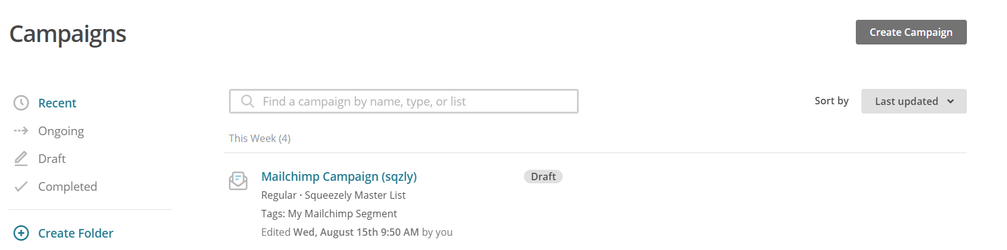
Viewing your audience in Mailchimp
- Login to your Mailchimp account.
- Navigate to 'Lists' on the top left of your screen.
- Click on the list you have connected to Squeezely.
- Open the drop down menu under 'Filter By Tags'.
- Search for your audience name in the drop down and select it to see who qualifies for this audience.

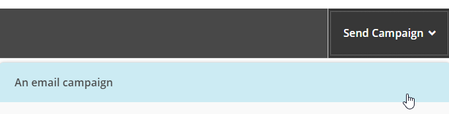
Sending a campaign to your audience from Mailchimp
After completing the steps under 'Viewing your audience', continue with below steps to send this group a campaign from within Mailchimp.
- Find the button 'Send Campaign'
- Select the option 'An email campaign'
- Complete the steps in Mailchimp
Triggering a Mailchimp Automation from Journey Builder
You are able to trigger Mailchimp Automations directly from Squeezely Journey Builder.
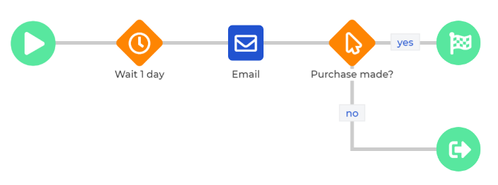
In below example the 'play' icon determines who will enter your journey. In this case an email will be sent to everybody that enters your journey after 1 day.
Find out more about building journeys here.
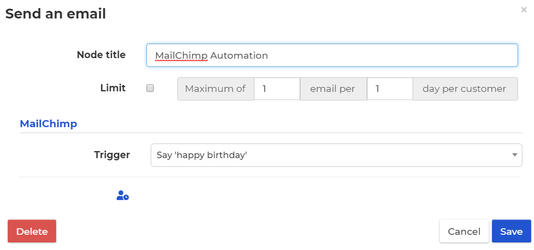
When using our Mailchimp connection sending of the email triggers will be handled by Mailchimp. You can select which automation should be triggered within the email object in a journey.
Before you will find any automations in Squeezely Journey Builder, first you have to create an automation in Mailchimp. Find out how to do so below.
Creating your automation in Mailchimp
- Log in to Mailchimp
- Create a new campaign of type 'email'
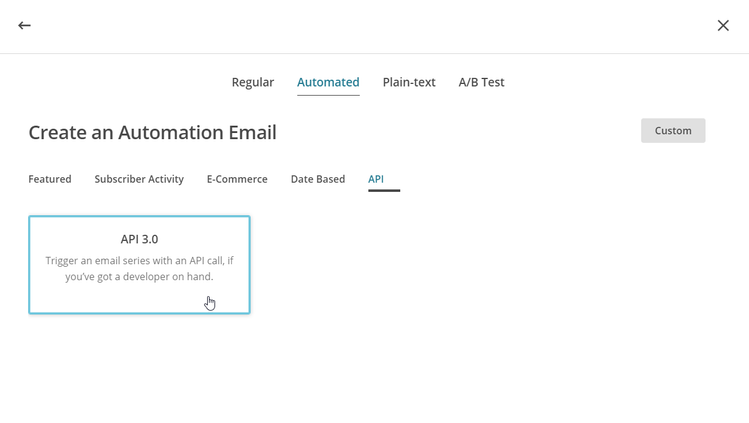
- Choose subtype 'Automated'
- Within the different options for automated campaigns, select API 3.0. This can be found within the tab API.
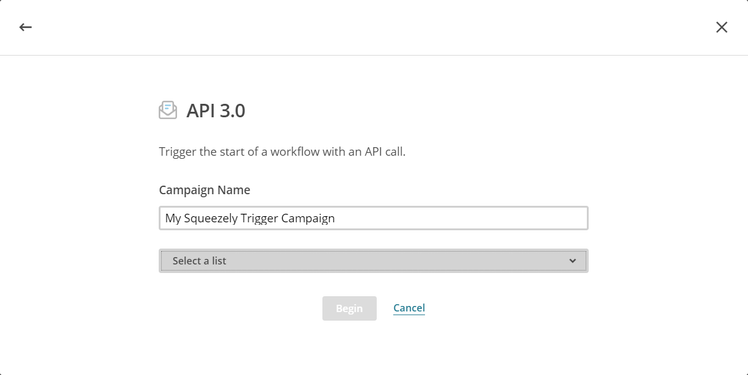
On the next screen, you give a name to your automation. This name will be listed in Squeezely Campaign Builder later.
From the drop down menu, select the list you have connected to the Squeezely Platform.
Now press Begin.
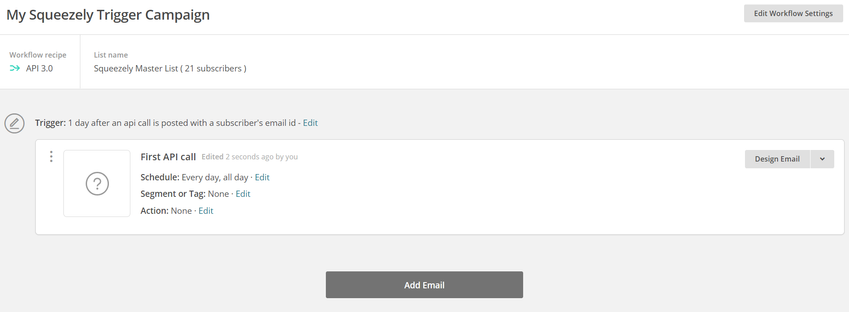
On the next screen, you will see an item named 'First API call'. This is the message that will be triggered by your Squeezely campaign.
NOTE: Squeezely will trigger only your First API call in the campaign flow. By default Mailchimp will give you 3 triggers that are activated by seperate API calls.
Go ahead and remove two of them, so your canvas will look like the example below.
You have a couple of options to set up your automation in Mailchimp:
Design Email: This enables you to select the template for the email that will be triggered.
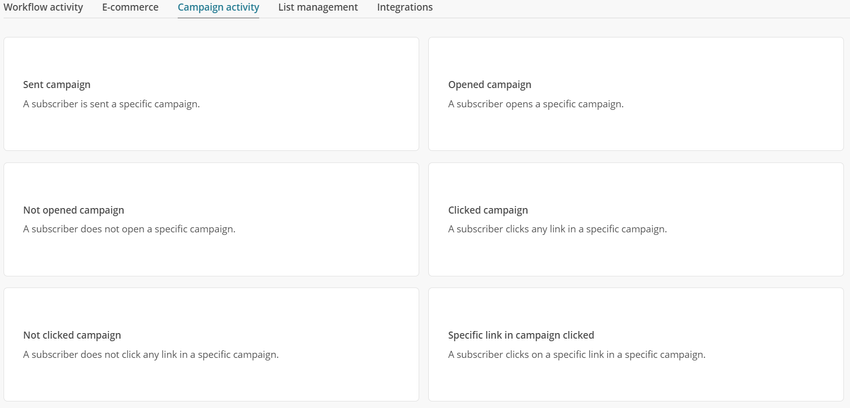
Add Email: Here you are able to decide follow up actions performed by Mailchimp after your initial mail trigger has been sent. For example send another mail if the original has not been opened and much more. To do this add an email and press 'edit trigger'. This will give you the options you see below.
When your done, save your automation and start it.
Search
Navigate
Want to find info about a specific feature? Check out these topics below!