Spotler
Tim Hoefnagel
Arno Van Laerhoven (Deactivated)
Using Squeezely with Spotler
This guide helps you setup & use your data on the Spotler email platform. The following steps are covered in this guide:
- Setting up the connection
- Triggering Spotler Campaigns from Journey Builder
- Using dynamic product content in your triggered emails
- Using Squeezely Audiences.
- Mapping custom fields from Squeezely to Spotler
What will happen when I connect my Spotler account to Squeezely?
- All Spotler contacts will be imported into Squeezely after connecting.
- Squeezely will collect all mutated contacts from Spotler on a daily basis.
- Your product catalog will be synced to Spotler so you can your products in Spotler templates
- You will be able to trigger campaigns in Spotler from Squeezely Journey Builder
- When you send triggers from Squeezely Journey Builder we will update your Spotler contact with the most recent profile values known in Squeezely
- Each time Squeezely recieves an Opt In status for a profile, this is synced to Spotler
Setting up the Connection
To setup the connection you will need an API key & Secret from your Spotler account. To create these, go to your account settings, under 'Integrations'.
Make sure you create an new authentication that is unique to Squeezely and has a unique externalid. This unique externalId has to be created by your account manager at Spotler first.
If you are unsure about setting this up, contact your account manager at Spotler.
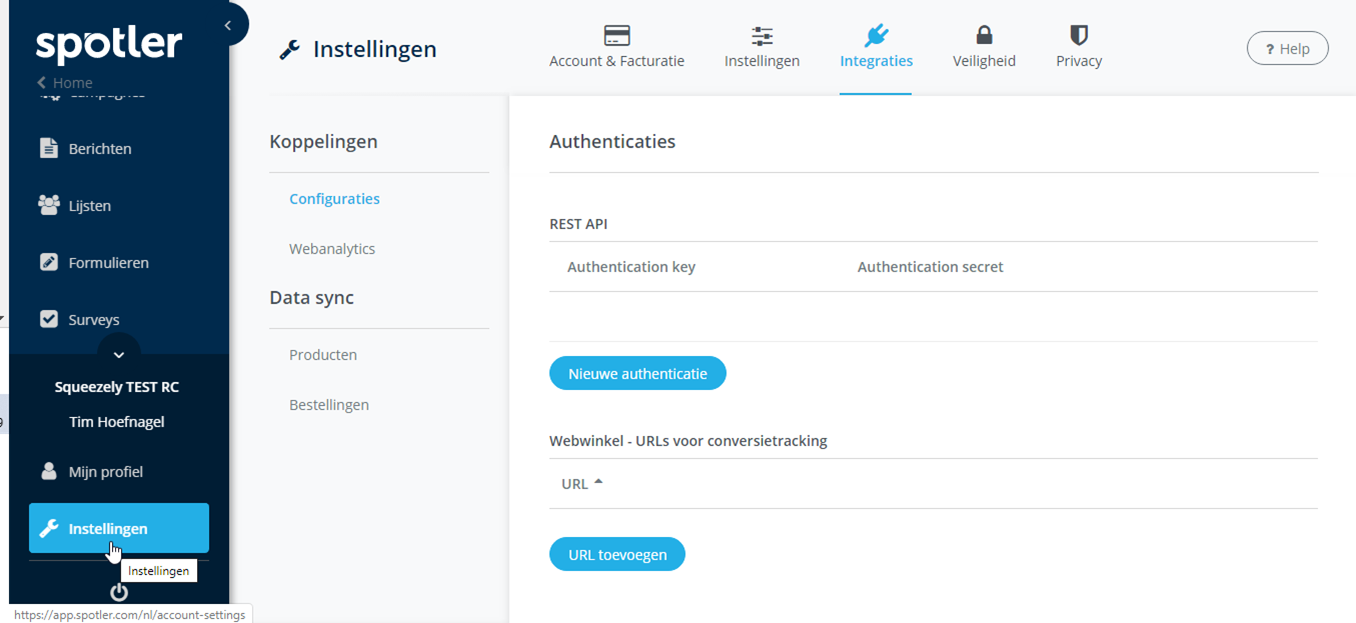
Copy your keys and find the Spotler connector in Squeezely, via https://www.squeezely.tech/company/settings . Click on the Spotler button and fill in your keys.
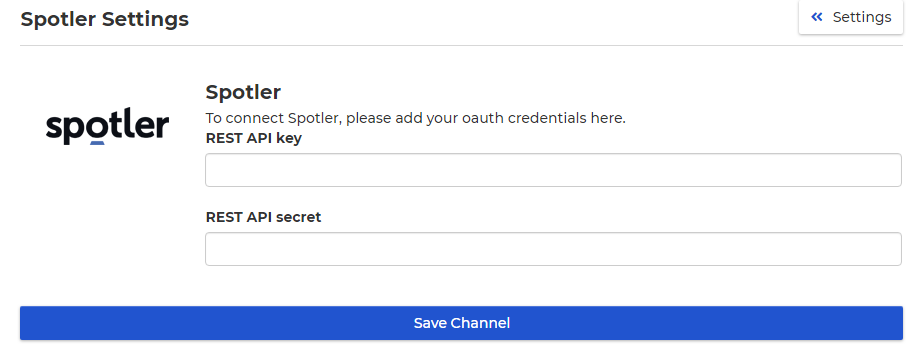
Using Squeezely Audiences within Spotler
When creating an audience, you click on the Spotler channel and then press 'Save audience'. The audience will then be synced straight away and remain daily updated.

Using Squeezely profile fields in Spotler
Every trigger you send from Squeezely Journey Builder, will update your Spotler contact with the most recent profile fields known in Squeezely. By default below fields are synced to Spotler with every call.
| Squeezely Field | Spotler Field |
|---|---|
| E-mailadres | |
| Email Hash | email_hash |
| Phone | Telefoon nr. |
| First Name | Voornaam |
| Last Name | Achternaam |
| Gender | Geslacht |
| Birthdate | Geboortedatum |
| Postal Code | Postcode |
| City | Woonplaats |
| Customer Phase | Squeezely - Customer Phase |
| Favorite Brand | Squeezely - Favorite Brand |
| Fav. Category 1 | Squeezely - Fav. Category 1 |
| Fav. Category 2 | Squeezely - Fav. Category 2 |
| Fav. Category 3 | Squeezely - Fav. Category 3 |
| Last purchase date | Squeezely - Last purchase date |
| Last visit date | Squeezely - Last visit date |
Adding email hashes to your template links
When exporting and audience to Spotler, a SHA-256 hashed version of the customer's email address is synced into the Spotler profile. This can be used to identify customers visiting your website from an email campaign. The email hash can be found in the spotler field 'email_hash'.
You can easily add it to all your links within Spotler:
- Go to 'Instellingen > Integraties > Webanalytics'.
- Select 'Extra Parameters' and set status to 'actief'
- Setup an 'Extra Parameter' from the menu with name 'email_hash'
- Under 'waarde', select email_hash as the field value to include in your URL's
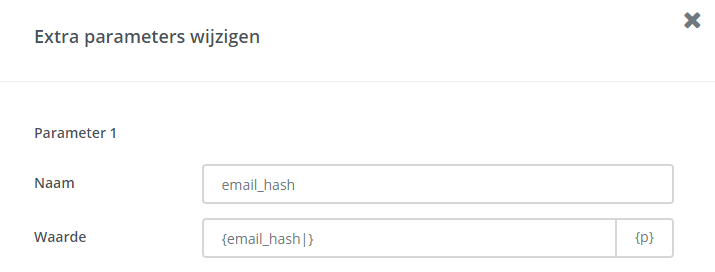
A SHA 256 hashed email will now be added to all your URL's. For example www.mysite.com?email_hash={email_hash}. This will now enable matching of customers that visit your website from an email campaign.
Mapping of custom Squeezely fields to Spotler contacts
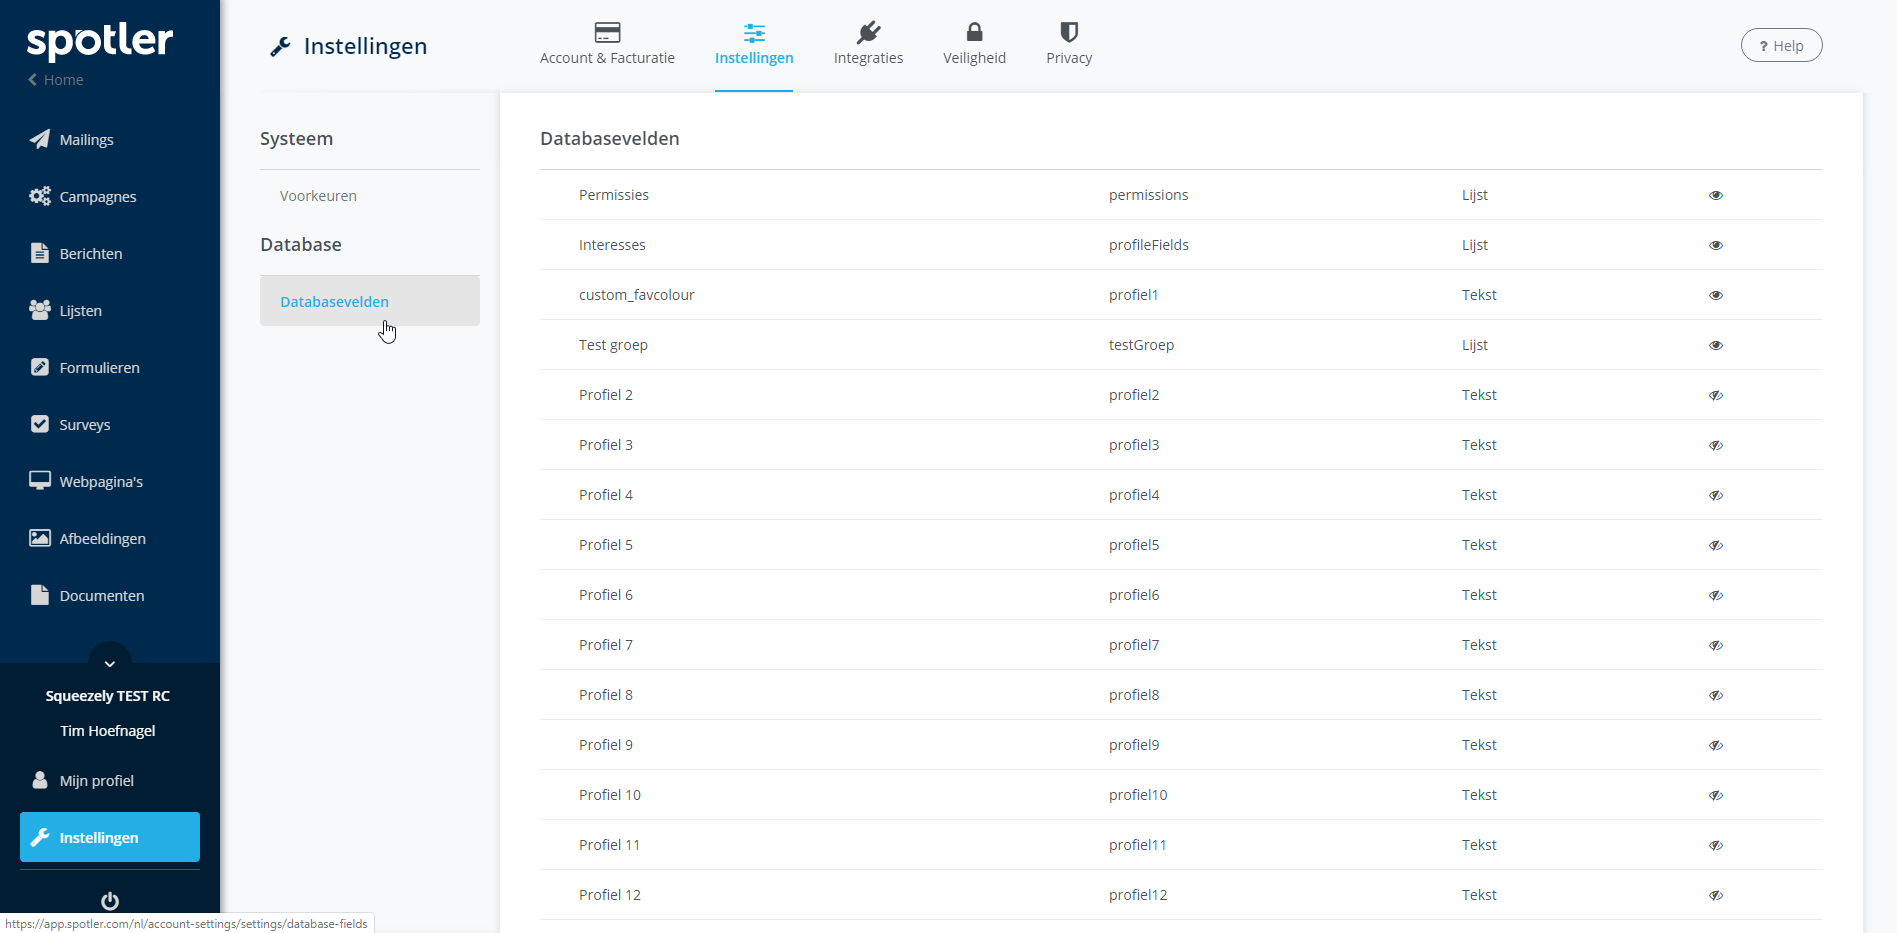
If you have Custom Profile Fields in Squeezely that you want to sync into Spotler, you will have to setup a mapping in Spotler. To do this, simply change the name of your Spotler Profile fields, to match one of your custom fields in Squeezely.
For example if you have a custom field in Squeezely, named 'custom_favcolour'.
In Spotler, find your database fields under Settings. Change one of the field names to match the fields you want to map from Squeezely. In the example below we have created the field name 'custom_favcolour'. This will make sure that each trigger from Squeezely Journey Builder updates your Spotler field 'custom_favcolour' with the value from Squeezely.
Triggering a Spotler Campaign from Journey Builder
You are able to trigger Spotler campaigns with dynamic templates directly from Squeezely Journey Builder.
To trigger a campaign from Spotler, first set up your campaign in Spotler. Choose an 'external trigger' for your campaign, so it can be triggered from Squeezely.
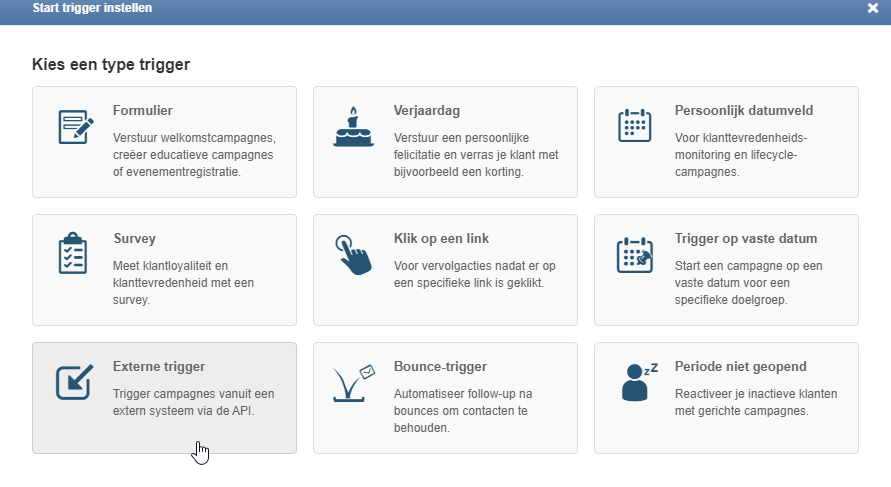
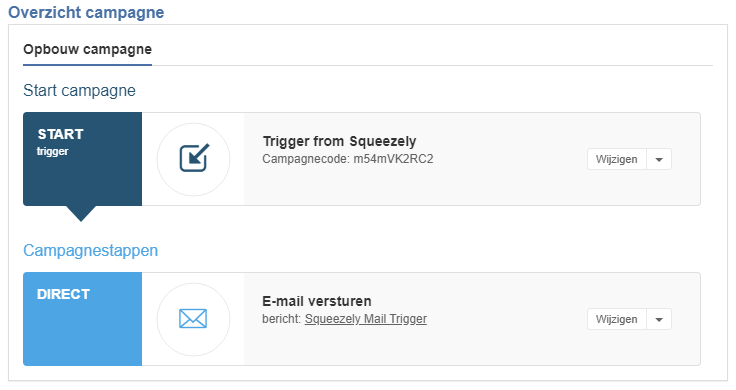
The name of your trigger will appear in Squeezely Journey builder and will activate all campaign steps added to your Spotler campaign.
NOTE: Make sure to activate your campaign in Spotler for it to be able to send out emails.
Using dynamic product content in your Spotler template
To use a template with dynamic product content in your Spotler campaign, create a new template using the type 'Product Review' or 'Verlaten Winkelwagen'.
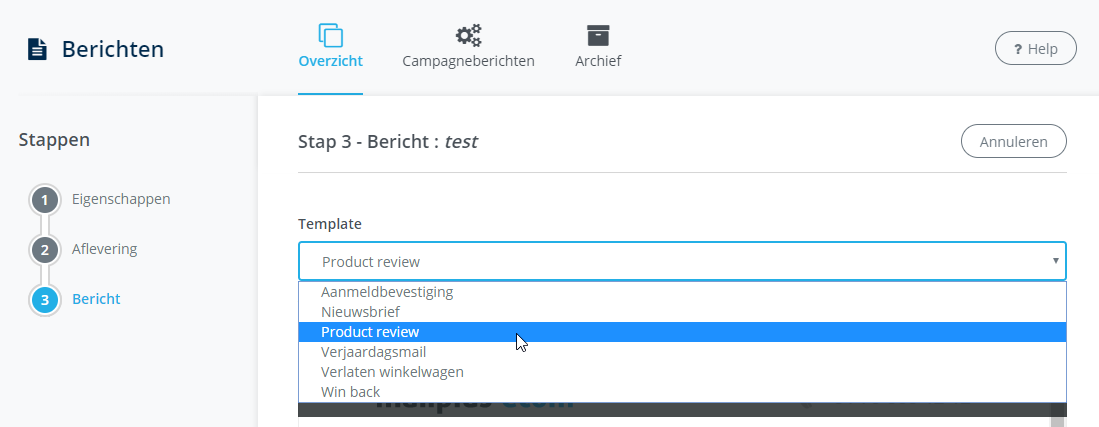
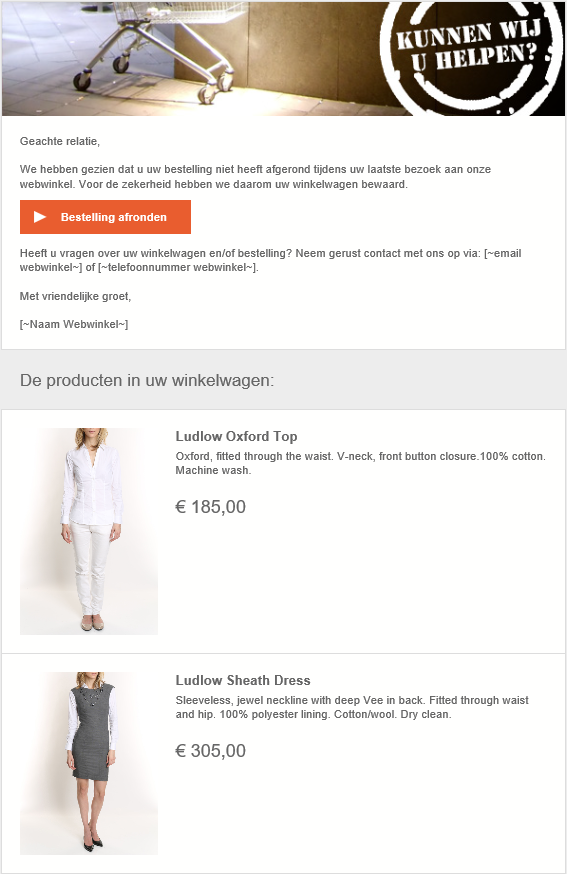
Edit the template to meet your requirements, but leave the product placeholder [campaignfield:productlist] intact.
This is where the products from the Squeezely Trigger will show up, like you can see in below example:
Triggering your Spotler Campaign from Squeezely Journey Builder
In below example the 'play' icon determines who will enter your journey. In this case an email will be sent to everybody that enters your journey after 1 day.
Find out more about building journeys here.

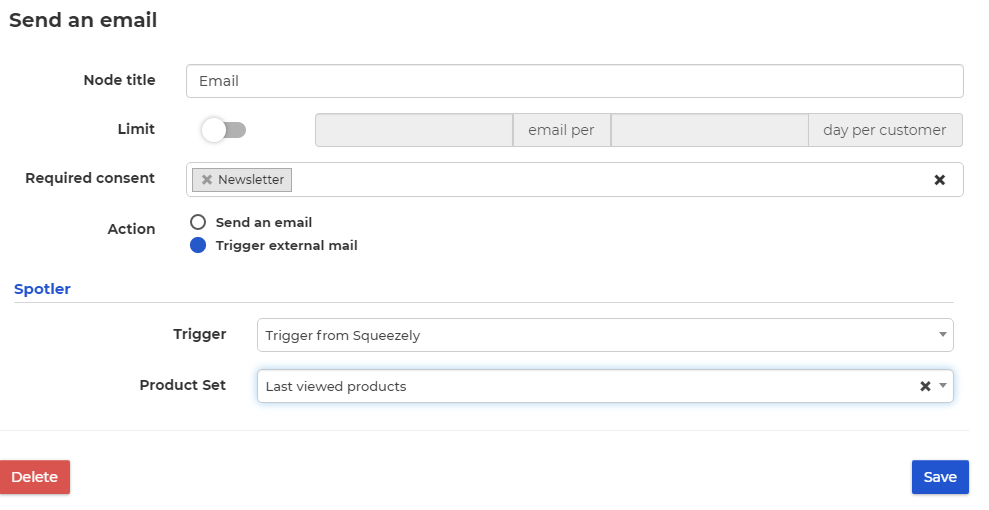
When you click on the blue email block, you will be able to make two settings:
- Select the campaign trigger from Spotler. This determines which campaign gets triggered for your customer.
- Select a Product Set. This determines which products will be shown inside your template when you are using a template with dynamic product content.
Press 'Save' and publish your journey to start sending.
Search
Navigate
Want to find info about a specific feature? Check out these topics below!