Using Squeezely with Mailchimp
Make sure you have setup a connection between Squeezely and your Mailchimp account. Find out how to set this up in our guide on Channel Integrations.
This guide covers the following topics:
Data syncing between Squeezely & Mailchimp
Squeezely syncs data with Mailchimp in the following cases:
Using Squeezely Audiences in Mailchimp
Following below steps will show you how to export an audience from Squeezely and where to find it in Mailchimp.
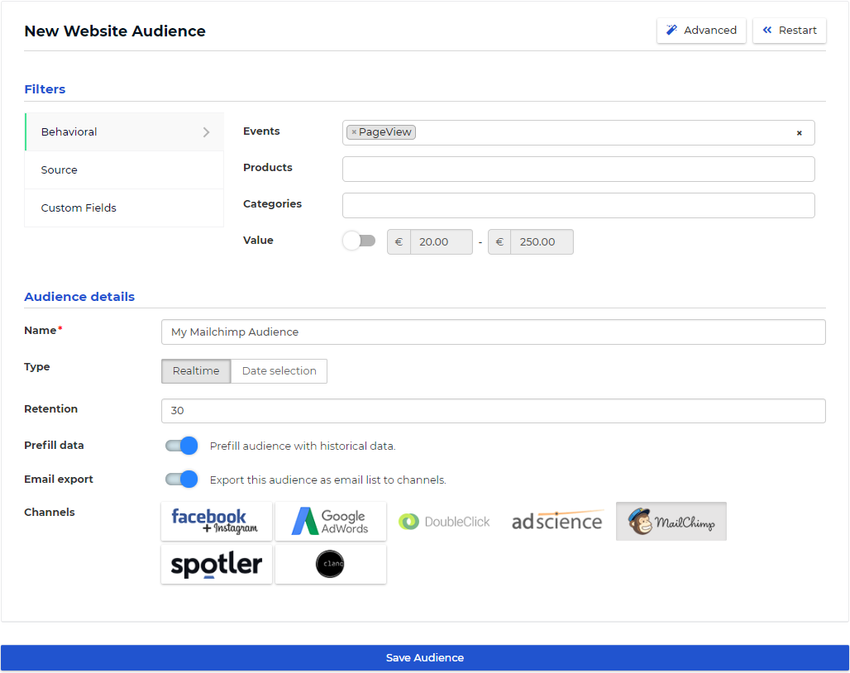
Exporting your audience
- Create an audience in Squeezely Audience Builder.
- Select Mailchimp as export channel.
- Press 'save'.
Viewing your audience in Mailchimp
- Login to your Mailchimp account.
- Navigate to 'Lists' on the top left of your screen.
- Click on the list you have connected to Squeezely.
- Open the drop down menu under 'Filter By Tags'.
- Search for your audience name in the drop down and select it to see who qualifies for this audience.

Sending a campaign to your audience from Mailchimp
After completing the steps under 'Viewing your audience', continue with below steps to send this group a campaign from within Mailchimp.
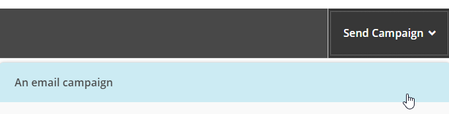
- Find the button 'Send Campaign'
- Select the option 'An email campaign'
- Complete the steps in Mailchimp
Creating a Mailchimp Campaign in Squeezely
You are also able to create a Mailchimp Campaign straight from the Squeezely Campaign Builder. To do this, navigate to Data > Campaigns in Squeezely and create a New Campaign.
Creating the Campaign in Squeezely
After starting a new campaign, fill in the details below:
Name: This will be the name for your campaign in Mailchimp.
Identifier: This is the campaign tag you will put in your campaign URL, under which you will find traffic from your Campaign in Squeezely Audience Builder & Dashboard.
Campaign type: Select 'Retargeting' for a one time send campaign.
Status: Set this to live.
Click Next step to select to which segment the email will be sent.

In this step we will determine to which segment your email will be sent. A segment is created by using your audiences from Squeezely Audience Builder.
Name: This will be the name for your segment in Mailchimp.
Include Audiences: People that meet criteria set for this audience will be included in your segment.
Exclude Audiences: People that meet criteria set for this audience will be removed from your segment, even if they are in the included audience as well.
Click Next step to finalize your campaign and to export it to Mailchimp.

First, click on add Channel on the left and select Mailchimp from the menu that is presented to you. This will add it to your list of channels.
Email Subject: This will be the subject that is copied to your Mailchimp Campaign. This can be changed within Mailchimp later on if needed.
Manager: Select the user that will be managing the campaign within your team. This person will receive a notification confirming the settings you have made.

Sending your Campaign from Mailchimp
After exporting your campaign from Squeezely, you will be able to find it in Mailchimp. Here you will add your template and send it to your Squeezely Segment.
- Log in to Mailchimp.
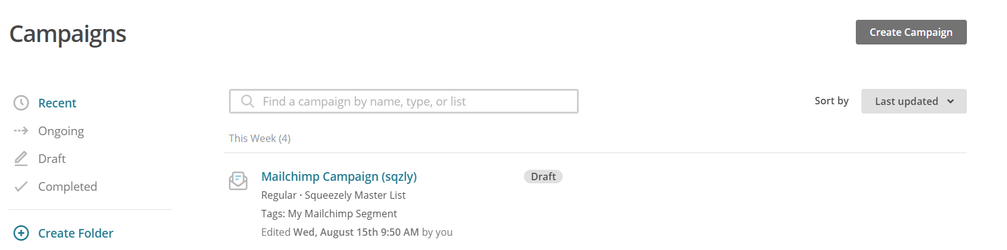
- Navigate to Campaigns in the top menu.
- Click on your campaign in the list.
- Finish your campaign by adding templates, URL tracking and more.
- Send it from Mailchimp.
Triggering a Mailchimp Automation from Squeezely
You are able to trigger Mailchimp Automations directly from Squeezely. These Automations are triggered based on the rules you have determined in you trigger audience.
Creating your automation in Mailchimp
- Log in to Mailchimp
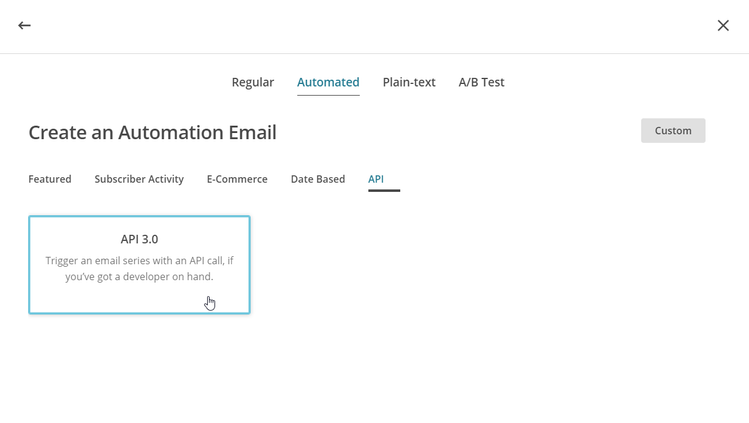
- Create a new campaign of type 'email'
- Choose subtype 'Automated'
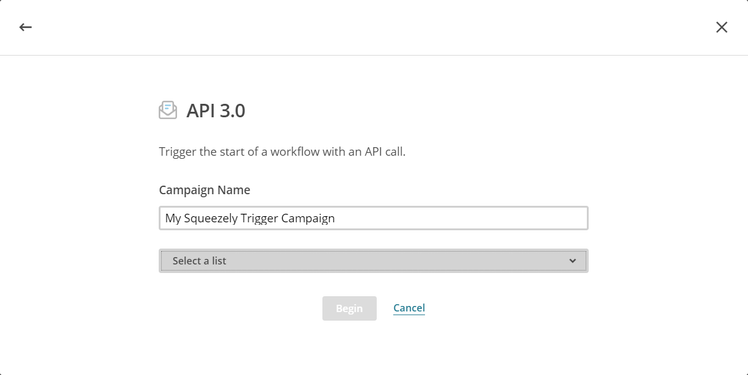
- Within the different options for automated campaigns, select API 3.0. This can be found within the tab API.
On the next screen, you give a name to your automation. This name will be listed in Squeezely Campaign Builder later.
From the drop down menu, select the list you have connected to the Squeezely Platform.
Now press Begin.
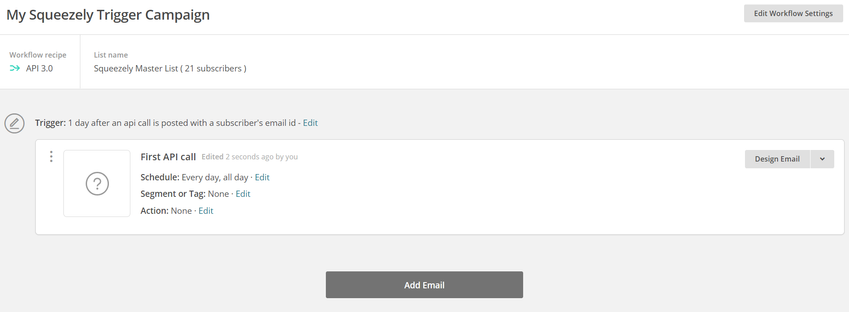
On the next screen, you will see an item named 'First API call'. This is the message that will be triggered by your Squeezely campaign.
NOTE: Squeezely will trigger only your First API call in the campaign flow. By default Mailchimp will give you 3 triggers that are activated by seperate API calls.
Go ahead and remove two of them, so your canvas will look like the example below.
You have a couple of options to set up your automation in Mailchimp:
Design Email: This enables you to select the template for the email that will be triggered.
Add Email: Here you are able to decide follow up actions performed by Mailchimp after your initial mail trigger has been sent. For example send another mail if the original has not been opened and much more. To do this add an email and press 'edit trigger'. This will give you the options you see below.
When your done, save your automation and start it.
Triggering your Automation from Squeezely
Create a new campaign in Squeezely and select type 'automated'.

In step 2, select the audience you want to use as your trigger for the automation. Any person that meets the criteria set in your audience trigger will be put in a queue to receive your campaign.
Use an exclude audience to set criteria for removing people from this queue.

In the last step. Add Mailchimp in the channel menu on the left. This will allow you to select you automation from a drop down list. Also you will be able to set a 'Buffer Period'.
Using a Buffer period
- You setup a buffer period of for example 1 hour and 30 minutes.
- When the included audience trigger has been met, for example when a person has viewed a pair of shoes on your website, the system will put this person in a queue to receive your email automation.
- After the buffer period has passed, the system will check if any excluded criteria have been met within the buffer period. For example a person has bought a pair of shoes after viewing them.
- Did any of your excluded trigger take place? In this case the person is removed from the queue and does not receive any email.
- No excluded triggers have taken place? In this case the selected email is sent out to the person in the queue.

Identify visitors from Mailchimp Using URL Tags
When your campaign is finished, a screen will show you which tags to use in order to track visitors from your campaign. For Mailchimp this URL tag will look like this:
?sqzl_campaign={Identifier}&sqzl_source=mailchimp&email=* | EMAIL_HASH | *
Campaign Identifier
The campaign identifier is used to track from which email campaign a visitor clicked to your website. This is set using the tag sqzl_campaign and contains the identifier you have set in step 1 of your campaign. You can use this information later to create an audience of all your campaign visitors. Also it will be used to determine how many visitors came to your website from the campaign in Squeezely Dashboard.
Source Identifier
This identifier represents the source and should always be 'mailchimp'. This will enable you to create an audience of all website visitors that have visited you website from any Mailchimp campaign. Also it enables a grouping off all visitors coming from your Mailchimp campaigns in Squeezely Dashboard.
Email Identifier
The email identifier is used to identify which CRM user is visiting your website. For increased privacy of your visitors the email address needs to be encrypted first, in stead of exposing the address in the URL. To to this Squeezely has synced an encrypted version of the address to Mailchimp. This can be loaded into your URL by adding the merge tag: * | EMAIL_HASH | * .
By adding the URL tag email=* | EMAIL_HASH | * to all your Mailchimp campaigns, Squeezely will be able to match people from your uploaded CRM files to website visitors automatically.
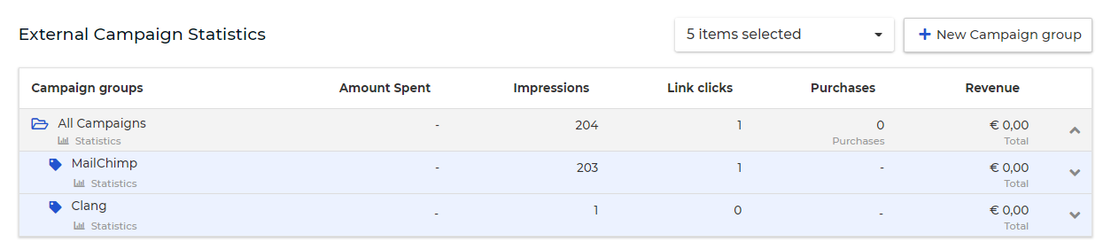
Mailchimp Statistics in Squeezely Dashboard
Unique Email Opens: This metric is synced to the column 'Impressions' in your Squeezely Dashboard.
Unique Link Clicks: This metric is synced to the column 'Link Clicks' in your Squeezely Dashboard.
Amount Spent, Purchases and Revenue metrics are not supported by Mailchimp and therefor are not displayed in the Dashboard.
Search
Navigate
Want to find info about a specific feature? Check out these topics below!