Welcome to the Squeezely Public Knowledgebase. Here is where you will find everything you need to know about using the Squeezely Platform.
Importing Data
Want to import some of your existing customers into Squeezely Platform? Find out how to do this below.
Using CSV Import
An easy way to import customers into Squeezely is by using our CSV import, find it here https://squeezely.tech/data/crm.
Preparing your CSV file
Make sure your CSV file uses a column delimiter that is either separated by comma (,) or semi-colons (;).
Also make sure that the first line of your CSV contains the name of your columns.
Also make sure that the first line of your CSV contains the name of your columns.
Important to know is that an email address is always required in your CSV upload. We use this to upload the data into the user profile containing this email address. If no profile containing a certain email address is available, a brand new one will be created.
The table below shows you which columns can be uploaded for a customer and which value formats are supported:
| Column | Description | Supported values |
|---|---|---|
| Firstname | First name of your customer | Alphabetical characters |
| Lastname | Last name of your customer | Alphabetical characters |
| Email address of your customer | adres@domain.com !REQUIRED! | |
| User ID | The user ID you use in your system to identify a user | Alphabetical and or numerical characters |
| Gender | Your customers gender | M, F, U, male, female, unknown |
| Birthday | Your customers date of birth | YYYY/MM/DD, DD/MM/YYYY |
| Phone | Phone number for your customer | Numeric including "-" and "+" (example: +316-12345678) |
| Zipcode | Zipcode for your customer | <4 digits>(space, optional)<2 letters>(example: 1234 AA) |
| City | City of residence | Alphabetical characters |
| Country | Country of residence | 2-letters, ISO-3166 |
| Currency | Currency used by this customer | EUR, USD, GBP |
| Newsletter | Permisson for sending newsletters | on, off, 1, 0 |
| Last Purchase | The date on which the user has made his/her last purchase | Unix Timestamp |
| Custom Fields | You can use custom fields to attach properties to users, that are not natively supported by Squeezely. For example: If you want to categorize your users on their continent of residence, you can create a Custom Field custom_continent. | Text, Number or Data format |
Uploading your CSV
When you have your CSV ready, follow the following steps:
- In the top right corner, click on import csv file.
- Select your CSV from your device and Upload your CSV file.
- Match the columns form your CSV against your Squeezely fields, like in the example below.
- When done, press save. Your customers will now be imported into Squeezely.
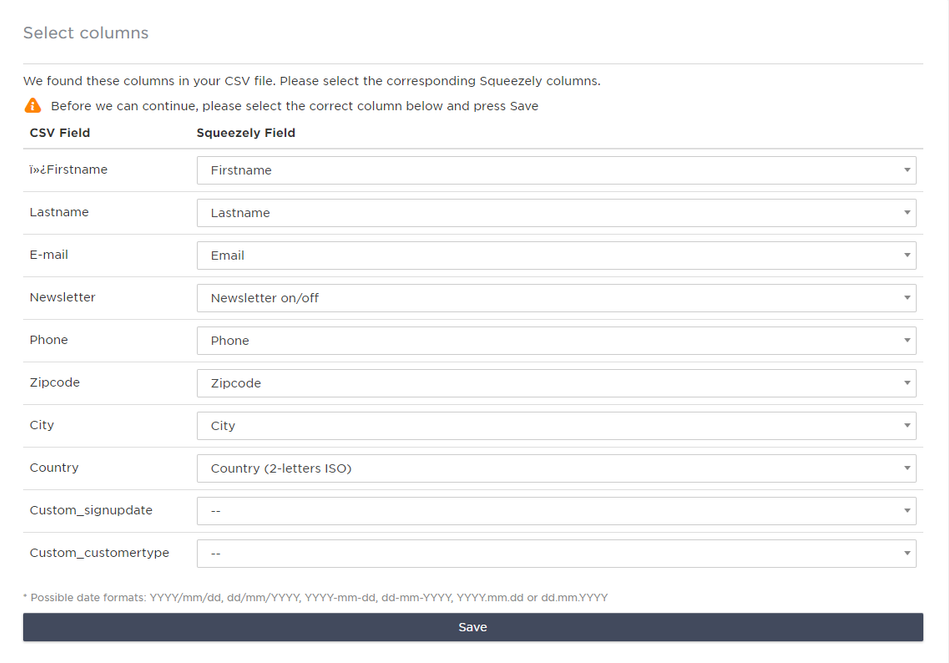
Example
The image below shows an upload of a sample file into Squeezely Platform. You will find two colums:
Left Column: The first row of your uploaded CSV.
Right Column: Your Squeezely Fields
Make sure you select the desired Squeezely Column for each of the columns in your CSV. All data will be uploaded into this field for your users.
Search
Navigate
Want to find info about a specific feature? Check out these topics below!